It’s a snowy winter day. You are walking to the mall to buy a new winter coat. The sidewalk is particularly icy today and you slip. You try to stop your fall by reaching out your hand. Your hand and wrist crashes down against the sidewalk. A sudden jolt of pain is felt through you wrist and it quickly swells. When you go to the hospital to get an x-ray it unfortunately reveals a wrist fracture. Your doctor places your in a hard plaster cast to allow your wrist fracture to heal. Lets learn about the recovery process that follows a wrist fracture.

What is it?
The two most common wrist fractures involve are a radius fracture and a scaphoid fracture. The radius bone is one of the two bones in your forearm. The radius is on the outside and the ulna is on the inside. A distal radius fracture is a fracture at the lower end of the radius. The scaphoid is one of the small bones just below your thumb. A distal radius fracture and scaphoid fractures usually occurs when your slip and try to break your fall with your outstretched arm. The rehabilitation process for both of these fractures are very similar.
What are the signs and symptoms?
As stated above, one of the most common causes of a wrist fracture is a fall on your wrist. Another traumatic cause can be from a blow to wrist by a blunt object such as a hockey stick. After these events the wrist will appear swollen and sore. A severe distal radius fracture could cause a misalignment of the wrist and a deformed appearance. An x-ray will be the best form of assessment to determine if there is a fracture.
How is it treated?
Your wrist will be healing in a cast for about 4-8 weeks. The cast will cover your wrist and most of your forearm. During this time it is important to maintain flexibility in your elbow and shoulder. Remember to move your elbow and shoulder so you can maintain mobility in those joints. After your cast is removed, your physiotherapist will work with you to stretch and massage your wrist to regain flexibility. You will be prescribed exercises at home to stretch and strengthen your wrist. Your strengthening program will evolve to sport specific exercises if your goals are to return back to playing sports.
Common Home Exercises
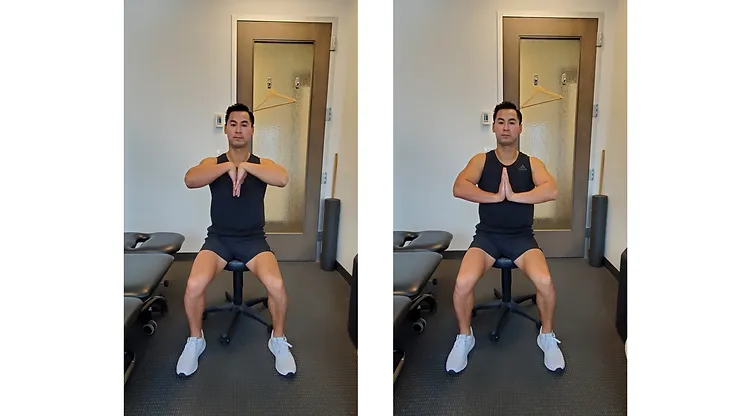
Prayer/ Reverse prayer stretch
Place your palms together. Lift your elbows up toward the ceiling. This will work on wrist “extension” range of motion. Hold this stretch for 30 secs and repeat for 5 sets. Place the back of your hands together. Drop your elbows down toward the floor. This will work on wrist “flexion” range of motion. Hold this stretch for 30 secs and repeat for 5 sets.
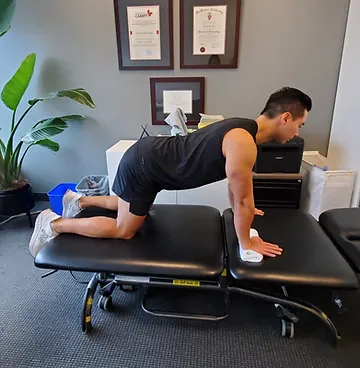
Push up with towel
After a wrist injury push ups are very difficult due to lack of flexibility in wrist extension. By placing a folded towel under the wrist you can begin practicing push ups before regaining full wrist extension range of motion. You can fold up the towel as thick or thin as you need depending on the flexibility of your wrist. Begin with doing these push ups standing against the wall. Then progress to kneeling push ups and finally to push ups on your toes as you can tolerate more weight on your wrist.
Pinch grip text book
This exercise works on improving your grip strength. The muscles in your hand that is involved with gripping connect from your fingers, travel across your wrist and, all the way up your forearm. The stronger these muscles become the better your wrist will feel. Pinch grip a text book with your fingers straight. Hold onto the text book for 15-60 seconds and repeat for 3 sets. Increase the weight by simply adding more text books.